Friday, 30 November 2012

Science Box - Blowing Up a Balloon with Gas


What you need:

Bicarbonate of Soda
Vinegar
Plastic Bottle (just a small one)
Balloon
Funnel (ideally have 2)


Step 1

Using a funnel (or just a steady hand) fill the bottle to 1/3 with vinegar.

Step 2

Using a dry funnel, half fill the balloon with bicarb of soda, so this is only about a teaspoon. 


Step 3

Pop the end of the balloon over the neck of the bottle with the balloon hanging down. Be careful not to tip the bicarb in quite yet.


Step 4

Lift the balloon and release the bicarb of soda into the bottle.  Now I struggled here and had to hold the balloon onto the bottle to  stop gas escaping.


Step 5

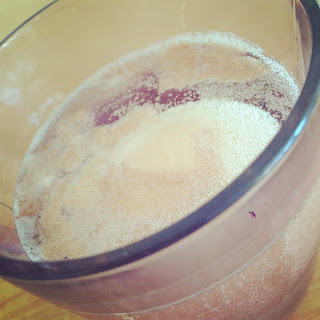
Watch as the mixtures fizzes and the balloon fills with gas.


What is happening?

Well this is an acid base reaction.  The mixture creates carbon dioxide and the gas needs space thereby inflating the balloon


This was fun and easy (apart from holding the balloon in place).  The inflated balloon felt a little heavier than a normal balloon because it contained carbon dioxide. 


Here is the link when I found this one: http://blogs.babble.com/family-style/2012/04/30/8-recipes-for-disaster/?pid=19534#blow-it-up

Monday, 19 November 2012

Science Box - Spy Girl Writing

Sorry, but I can't find where I got this one from originally.  Also please forgive the annoying purple mark that has made its way into all my pics!

What you need:

A lemon
An earbud
Iodine
Spray bottle
Paper

I bought 'iodine tincture' from a high street chemist.  A word of warning, this iodine stained my hands so be careful not to stain anything with it.


Step 1

Cut the end of the earbud to make a writing nib.

Step 2

Dip the nib into the lemon and writing a message on the paper.  You will be able to see what you have written but once it has dried it will be hard to read, although not completely invisible.


Step 3

Add a couple of drops of iodine into some water.  Be careful not to stain anything with the iodine.  I made mine up into a little spray bottle.  You could 'paint' the solution but you risk drenching the paper.


Step 4

Lightly spray the paper with the solution.  Hey presto!  The secret message is now revealed.


I am sure my daughter will love this and will be able to send secret messages time and again.  It is simple but fun.

Science Box - The Naked Egg

Here is the link to the original experiment I found online: http://www.imaginationstationtoledo.org/content/2011/04/how-to-make-a-naked-egg/

What you need:
An egg - just a normal raw egg
A cup/bowl/jug
Vinegar
Water
Golden syrup


Step 1

Pop the egg into a cup or similar.   Preferably one that you can see through.  Then cover the egg with vinegar.  Set to one side.


Step 2

After a few hours you ill see a sort of fizzy/scummy layer floating at the top.  However, leave the egg along for approx 24 hours.


Step 3

After leaving it for a day or so.  Tip the egg carefully into your hand over the sink. You may choose to replace the vinegar and leave it for another day.

Step 4

Pour the egg gently into your hand again.  You will notice that the shell has been broken down by the vinegar and the egg feel like a bouncy ball.  You will also be able to see the yolk floating around inside.  Be careful whilst you play with it.....Or see how many times you can bounce it before making a mess!


Step 5

If you put the egg back into the cup and fill it with water, you will see that the egg absorbs some of the water and gets even bigger.

Step 6

Drain the water, and this time cover the egg with golden syrup.  After a few hours you will see that the water has started moving back through the membrane.  If you tilt the cup, you can pour the water at the top away so the egg is still surrounded by the syrup.  Leave it for another day and drain the egg, you will see that it is all saggy! It is much easier to see the yolk now too.


Step 7

Now if you put the saggy egg back into water, it will return to its bouncy state again.


Step 8

You could repeat the above steps as many times as you want, but eventually the temptation to break the egg is too much!  I squeezed the egg over a bowl until it popped!


I really enjoyed this one!  I found it fascinating.  I just wonder how long the egg will last in the hands of my six year old. 

Monday, 12 November 2012

A little bit about how it all began....


Like many other parents, I gave up my first career when I started a family. I want to be at home whilst my children are young and so I now work for myself from home.

I have always been quite crafty and like to give arty things a go, but often with limited success.  I also dabbled in some development work and picked up some good digital art experience.  This is the basis for many of my products that are available today. I bought myself a big wide format print that allows me to produce excellent quality print work with ink that is guaranteed to last.

Here is a photo of a mixed media owl that I painted for one of my children's bedrooms a few years ago.


As you can see, this was the inspiration for my first personalised canvas which is available to buy:


I think this is still my favourite canvas as I love the depth of colour!  It is available to purchase at

http://www.madeonmydoorstep.co.uk/category-17/001003.html


Friday, 9 November 2012

Science Box - Hovercraft

First things first - here is where I found the instructions for this experiment:

http://scribbit.blogspot.co.uk/2010/08/summer-kid-crafts-make-hovercraft.html


What you need:

An old CD/DVD
A sports cap from a plastic bottle
A balloon
Superglue


Step 1

Stick the bottle cap over the hole in the CD.  The instructions I read suggested that you use a 'pull up' cap, but I didn't have one of those. You want to seal around the base of the lid to the CD.


Step 2

Once the glue has set, blow up the balloon and place it over the cap.  This is where it might be easier if you did have a 'pull up' cap, as you could have the cap closed until you were ready.

I just pinched the base of the balloon to stop air escaping until I was ready to let go.


Step 3

Place the hovercraft onto a flat, solid surface - this isn't go to work on carpet.   Let go of the balloon, or open the cap.


Step 4

Watch as the escaping air pushes the CD around the floor.  

It is all over pretty quickly as you would expect and whilst amusing, the results may be a little disappointing.  My 6 year old will expect it to really fly around.  Perhaps I should buy a bigger balloon if this is going to make it into the Christmas Science Box - it will be on the 'maybe' list for now.